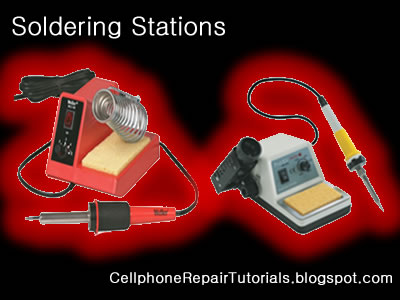
Best All mobile Repairing solutions, unlock pattern lock, Hang on Logo,All Box Latest UPDATES and All type CPU Format solutions provideing, How to Flash Mobile phone without BOX use and Open Google Gmail Lock

Wednesday, May 30, 2012

Nokia 1208 Blue display solutions


noki phone in 1208, is a class of low-end phones, and this ponssel often experience some problems, especially damage to hardware, from local damage mode, the lights went out, even to damage to the screen, which looks blue screen, there are various ways to repair every cell phone, but not yet certainly damage can be overcome in the same way, although having the same type of damage

well for that, am I here want to share to you about how to repair nokia 1208 cell phone were damaged, blue display. I do it? try you noticed the image above

How to Check Basic Electronic Components Using a Multi-Meter


How to Check Basic Electronic Components Using a Multi-Meter 

Basic electronic components such as resistors, capacitors, diodes and transistors are widely used in any electronic devices and gadgets. Knowing how to conduct a test on this components using a multimeter would give you an idea on how to trouble shoot and repair any defective cellphones or electronic equipments at home. Below are some basic D.I.Y. regarding proper testing of this components using a multimeter.


How to Check Resistors?

Read the indicated  code value indicated in Schematic Diagram then select the Ohm-scale within but not way below the indicated value. A resistor is good if its resistance is close to the indicated value.Tolerance should be considered with the ohmmeter reading. While, no resistance reading at all on the ohmmeter scale settings means that the resistor is open. A zero resistance reading on all ohmmeter scale settings means that the resistor is shorted. 
Photobucket

How to Check Capacitors?


In most cases, a capacitor fails due to the deterioration of the dielectric material between its plate.Defective capacitors can have an internal shorted terminals, excessive leakage and degradation of capacitance meter. For an electrolytic capacitor (capacitors with polarity), short the terminal capacitor to discharge it prior to testing.

To test a capacitor, set the multimeter to Rx10 or Rx1K scale. Connect the tester negative probe to the capacitor positive terminal and the positive probe to the negative terminal. 
Photobucket
A good indication for electrolytic capacitor shows the meter needle deflecting towards zero and moves back again to infinite resistance position. 
For ceramic, Mylar and other capacitor with a capacitance with less than 1.0 uF, the meter will not deflect at all. 
Photobucket
A defective indication for an electrolytic capacitor shows that the meter will rest on zero and remain stationary at a point which is an indication that the capacitor is shorted.

How to Check Diodes?


Set the multimeter knob to any of the resistance position (x1, x10, x1K or 10K ohm ).Connect the positive probe to the anode and the negative probe to the cathode.Then connect the positive probe to the cathode and the
negative probe to the anode of the diode. A good indication in the first procedure will show the meter deflected very little or may not deflect at all.
Photobucket
And in the second procedure, the meter will deflect towards zero.The actual resistance reading is the forward resistance of the diode. 
Photobucket
A defective indication shows that the meter won't deflect at all even when the probes are reversed. Or the meter deflects at the same time or almost the same resistance reading for both steps.

How to Check Transistors:


Bipolar transistors are usually checked out of a circuit by means of an ohmmeter. When it is desired to check for the resistance across the transistor emitter and collector, NPN or PNP, ohmmeter probes may be connected either way. A good transistor will show above a reading above 1000 ohm.

How to determine if it is NPN or PNP transistor?

To determine the correct terminal of the transistors, set the range selector to x 1 or 10 ohm.Connect the positive probe to the emitter and the negative probe to the base of the transistor. Note the reading interchange the connection of the probes to the leads of the transistor.

Base your conclusion on the table:

POSITIVE PROBE TO: -----NEGATIVE PROBE TO: -----RESISTANCE READING-- CONCLUSION:
  Emitter------- --   Base---------- Less than 150 ohm ------Transistor is NPN
 Base --------------Emitter --------Infinity ----------------Transistor is NPN
Photobucket

POSITIVE PROBE TO:  NEGATIVE PROBE TO:   RESISTANCE READING:    CONCLUSION:  
-Emitter------------Base ---------Infinity   ----------------  Transistor is PNP
Base --------------- Emitter --- - Less than 150 ohm -------  Transistor is PNP
Photobucket
Some defective indications of transistors: Resistance between any pair of the terminals is less than 10 ohms, means that the transistor is shorted. Resistance between base and emitter or base collector for both the forward and reverse application of ohmmeter probes is infinity (meter needle don't deflect), means that the transistor is open. Transistors overheats (except power transistors) during normal operating condition means that the transistor is shorted.

 How to Check an LED ( Light Emitting Diode)

Set the Muti-meter to x1 connect the positive probe to cathode and the negative probe to anode. The good and working LED will then light up or glow, a busted LED will not.
Photobucket

How to Check a Coil?

Set the multimeter to X1 a good and working coil have a reading approximately point to zero ohms, without any reading means the coil is open or busted.
Photobucket

How to Check a Fuse?

A blown SMD Fuse is not visible to our naked eye, just set the multi-meter to x1 and put both test probe to both end side of the fuse. A full reading here to zero or continuity check is full. without any reading means the fuse is already busted.
Photobucket

How to Check IC chips (Integrated Circuits)?

IC Chips is hard to determine faulty by using only a multi-meter, some advance equipment like the one that the manufacturer used during their productions. However; you can determine a faulty chips by some few experiences when it comes to troubleshooting, One techniques is that by comparing two same components from one another. like for example; if one chips is suspected to be faulty, then by replacing it with a good and working same chips, you can now determine it if the said chips got a problem. It is a trial and error method at first; but as long as your experience and knowledge skills increases, you can determine it more quickly and accurately.
Further, we will tackle this issues and give you some tips and tricks.

Soldering and Desoldering Tools


Soldering Iron
A soldering iron is a tool normally used for applying heat to two or more adjoining metal parts such that solder may melt and flow between those parts, binding them securely, conductively and hermetically.
A soldering iron is composed of a heated metal tip and an insulated handle. Heating is often achieved electrically, by passing an electrical current (supplied through an electrical cord or battery cables) through the resistive material of a heating element. Another heating method includes combustion of a suitable gas, which can either be delivered through a tank mounted on the iron (flameless), or through an external flame.
Some soldering irons heat up and cool down in a few seconds, while others may take several minutes.Soldering LEAD
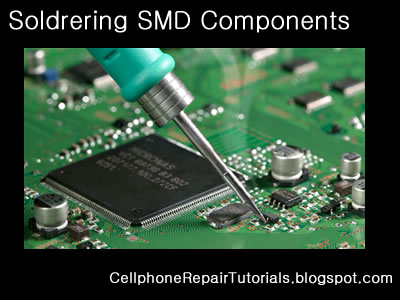
 Soldering lead is used to bond or connect electronic components. 
Solder is a fusible metal alloy with a melting point or melting range of 90 to 450 degree Celsius (190 to 840 °F), used in a process called soldering where it is melted to join metallic surfaces. It is especially useful in electronics . Alloys that melt between 180 and 190 °C (360 and 370 °F) are the most commonly used. By definition, using alloys with melting point above 450 °C (840 °F) is called brazing. Solder can contain lead and/or flux but in many applications solder is now lead free.


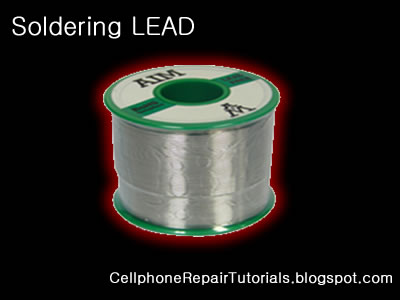
While it is possible to do some wiring without soldering connections, soldering is the preferred approach. Proper soldering is easy with the right tools and techniques. One item that is critical is the right solder. DO NOT use the environmentally friendly lead free solders, they don't work worth a damn. Even in carefully controlled industrial conditions, lead free solders produce inferior connections. As much as the politicians backed by environmentalists would like to, they can't legislate metallurgy.
Soldering Paste
Solder paste (or solder cream) is used for connecting the terminations of integrated chip packages with land patterns on the printed circuit board. The paste is applied to the lands by printing the solder using a stencil, while other methods like screening and dispensing are also used. A majority of defects in mount assemblies are caused due to the issues in printing process or due to defects in the solder paste. An electronics manufacturer needs to have a good idea about the printing process, specifically the paste characteristics, to avoid reworking costs on the assemblies.


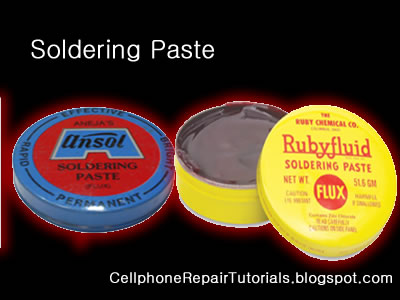
Characteristics of the paste, like viscosity and flux levels, need to be monitored periodically by performing in-house tests.
Soldering flux Soldering flux is just a safe, convenient acid for dissolving the oxide skin off the metal
you want your solder to wet well. Also dissolves oxide off the liquid solder, making it
less crusty and therefore more shiny.


"Acid" flux is the stronger class of flux; it has something like hydrochloric acid in
it. (The paste form has zinc chloride.)
This is good for making difficult oxides dissolve so difficult metals like stainless
steel can be solder-wetted.
But the acid can hang around later trying to corrode the metal it just cleaned for you.
So for electronic stuff we mostly do not use it.
If we do, we scrub it off with things like toothbrush, water, soap, alcohol, baking soda,
to minimize acid residues.

The flux built into most solder wire is called rosin flux.
I think it is an organic acid (so is vinegar, and tart-tasting "citric acid"),
stuck onto larger molecules that melt only at soldering temperatures.
That is the clear yellow-brownish plaque that sits on the solder's surface when you are
done.
It does the same stuff as acid flux, but it is milder two ways.
It is only strong enough to reduce weakly oxidizable metals like copper, tin, lead,
silver.
So it is just strong enough for electronics use, but not for soldering to stainless
steel or iron or anything with chrome or aluminum.
And rosin-flux goes back to its plastic-like solid form after use, so it does not act
very corrosive to the metals later on.
So we do not need to clean it away carefully.
It can be cleaned away if you want to work at it, with brush-scrubbing and the right
"polar solvents".
"Flux remover" is sold in spray-cans for this. Rubbing alcohol with a dash of dish-soap
sort of works for me.
Try it and see what it looks like.


 Soldering Wick
A solder wick (also desoldering wick or desoldering braid) is a tool for removing solder from any solder joint. Usually, it is a roll of fine, braided 18 to 42 AWG wire, typically oxygen free copper, which has been treated with a rosin solder flux.


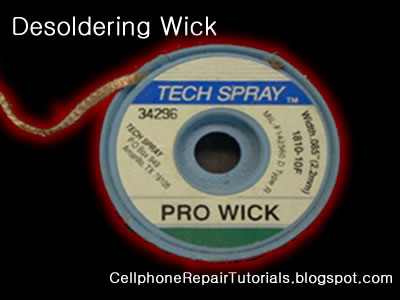
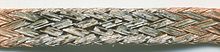
Close up to a piece of solder wick


Close up to the netting of a solder wick


To remove solder with it, one presses the wick onto the solder joint to be removed and then heats the wick portion that is on the connection with the tip of a soldering iron. As the rosin melts onto the wick and the connection and the solder reaches its melting point the solder rushes via capillary action onto the clean copper braid. Once everything has melted and the solder fuses with the braided copper, the wick is lifted along with the solder and is then cut off and disposed of

LG Optimus One P500 Hard Reset procedures, restore to factory setting


Here's, a step by step instructions how to hard reset the LG Optimus One  P500 to clear all data and restore its original factory default settings.

Note: As a result of this procedure, all data and application installed on  LG Optimus One P500 will be deleted or cleared. However, this process may or may not delete data stored on the microSD memory card. We advice to back up all of your personal data before proceeding.

Factory Reset on Menu Setting

   1. From the main home screen, tap menu
   2. Select Settings, then Privacy
   3. Select Factory data reset
   4. Select Reset phone
   5. Enter the password if required, then confirm by selecting Erase everything

If the phone is frozen, hard reset it through buttons

   1. Turn the power off. If the phone is frozen, pull the battery out and inplace it back again
   2. Hold the Home and Volume Down button
   3. Press and hold the Power button until the phone turns on
   4. Follow the on-screen instructions to hard reset the  phone handset

The LG Optimus One P500 will then reboot to its factory fresh default state settings.

Most Download


Text Widget

Copyright © Best All mobile Repairing solutions | Powered by Blogger

Design by Anders Noren | Blogger Theme by NewBloggerThemes.com