Best All mobile Repairing solutions, unlock pattern lock, Hang on Logo,All Box Latest UPDATES and All type CPU Format solutions provideing, How to Flash Mobile phone without BOX use and Open Google Gmail Lock

Friday, June 1, 2012

Nokia E5 Not Charging Problem Solution - Charge Ways


This is a Nokia E5 solution for 'Not Charging Problem' or if phone shows no charging indication when the battery charger is plug-in. The solution below shows the primary components that needs to be check if the charging problem occurred.

Just refer to it and locate the highlighted components then follow some simple procedures we provide below.

Nokia E5 Not charging problem repair solution
Repair hints for Nokia E5 Not Charging Problem:
1. Try to use another working charger.
2. Check, clean or replace the charging pin connector if oxidized. 
3. Clean the charging pin connector terminal contact pads.
4. Check/ replace the fuse and the chip diode.
5. Check/replace the highligted transistor, resistors and capacitor.
6. If the above procedure won't fix the problem, the possible faulty is the GAZOO IC.
7. Reheat, rework the GAZOO chip, replace if necessary

Nokia E5 Buzzer, Ringer IHF Speaker Problem Solution


Nokia E5 buzzer jumper ways
Here's the Nokia E5 Buzzer, Ringtone Speaker Problem Solution. This may help fix the phone if there is no ringtone sound, or media audio sound output can be heard on it.

Just refer to the solution below and locate the primary component parts which need to check first if the buzzer problem occurred on Nokia E5. We also includes  a simple step by step procedures on how to troubleshoot this problem.
Nokia E5 Buzzer, Ringer Speaker Jumper Ways
Repair hints for Nokia E5 buzzer speaker not working problem:
1. Check the IHF speaker using a multimeter, replace if found damaged.
2. Clean the IHF speaker terminal contact pads on the PCB board if oxidized.
3. Check/replace the speaker filter coil.
4. Trace both negative and positive connection paths.
5. Check/replace the coils and capacitors near the GAZOO IC.
6. If the problem continues, the problem may possibly lies on the GAZOO IC, reworking or replacing it might only fix the problem. Enjoy

Nokia C2-03 White Screen, No LCD Screen Display Problem Solution

Nokia C2-03 White Screen display solution


This solution covers to fix Display problem for Nokia C2-03, C2-06 and C2-08 Dual SIM card slider phone. These are just simple hints on how to troubleshoot display problems such as white screen, empty or black screen. I'm referring display problem that you may still hear an audio from the device like welcome tone, alert tones or ringtones., and this solution covers for hardware troubleshooting only. 

Some white screen are cause by a firmware failure. So, if you may try to figure it out either you will do a software or hardware calibration do things as follows. 
Power up the device, observe if you can still hear any welcome tone. Try to send message or call the phone and see if the alert or ringtones is still in there. If you do can still hears it, then the problem is on hardware failure, If there is no response at all and just stock in white screen then the problem lies on firmware.


How to fix Nokia C2-03 White screen and other display problems such as blue screen, blank or empty screens. 

If you try to fix firmware problem, simply flash the phone to it's original firmware version. The firmware version for Nokia C2-03 is RM-702.

If you do have hardware problem, follow the simple hints below. 
1) Check the flex and LCD pin to pin connections, ensure that it is properly in good contact. A weak or loosen contacts will cause the display problem. 
2) Check the LCD screen for possible damaged or cracked. If you ain't sure better have a extra LCD at hand just for a quick test. 
3) Check the flex ribbon cable for possible damaged. Since Nokia C2-03 is  a slider phone, the possibility of display problem is cause by flex failure.
4) If both the flex and LCD were already confirmed working and okay. You may then proceed in troubleshooting certain components on the Nokia C2-03 PCB board.
5) See the solution below, check the highlighted components surrounding, clean it if there is an oxidation spotted. 

View larger image here.
6) Check each of the display filter components, do rework, resolder or replace it. 
This solution may also works on Nokia C2-06 and Nokia C2-08 dual SIM card phones, because both are the same as of Nokia C2-03 PCB board.

Nokia E5 LCD Display Light Problem, DarK Screen Solution

Nokia E56 dsiplay light problem jumper ways

This solution may possibly help fix the Nokia E5 Display light problem.  This kind of problem  shows a dark screen displays on the LCD because a lack of illuminating backlight LED on the back of the LCD screen.
This may happen if the phone suffered wet or water damaged, accidentally dropped by the users.

Just refer to the solution below and locate the primary components that needs to be check first.

Nokia E5 Display Light Jumper Ways - connection track


Troubleshooting hints on Nokia E5 LCD display light problem:
1. First try to replace the LCD screen display module.
2. Check the LCD pin connector, clean, re-solder it if necessary.
3. Check/read the VBAT voltage across the inductor coil, check the inductor coil too, replace if found damaged.
4. Trace the connection line paths of VLED-, VLED+ and the switching line.
5. Check/ replace the resistors near the LED driver IC.
6. Rehot, rework or replace the LED driver IC.

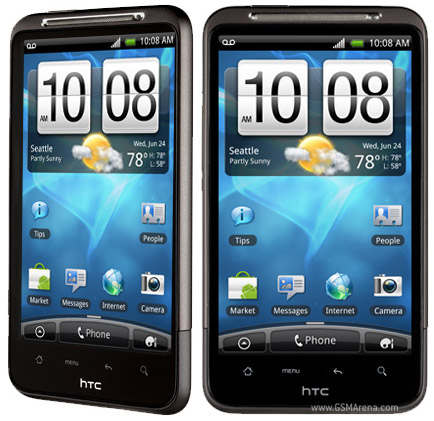
HTC Inspire 4G hard reset , format and restore to factory settings


Here's the simple step by step procedure on  how to hard reset or format the HTC Inspire 4G and  restore it  back to factory default state settings.

Please note: All data and application installed or stored will be deleted on HTC Inspire 4G as a result of this process.
Just make sure to save all data and personalized application and settings installed before commencing the factory setting. Performing a hard reset is only advisable if the HTC Inspire 4G experiencing application problem like freezing, hang up or halting etc. This process will restore the device to its original factory default state.

However, this process does not delete the data stored on the microSD memory card. Just back up it first before you proceed.


Resetting through Menu Settings


   1. On the main home screen, select menu

   2. Select Settings, then Privacy

   3. Select Factory data reset

   4. Select Reset phone

   5. Enter your password if prompted, then select Erase everything upon confirmation


If the  device is frozen, Do a hard reset through button combination:


   1. If your HTC Inspire 4G is frozen, Turn the power off or then pull the battery out and put it back again

   2. Hold the Volume Down button

   3. Briefly Press and hold the Power button until the device power on

   4. A menu will appear that allows you to choose for Fastbook, Recovery, Clear Storage, and Simlock

   5. Select Clear Storage by pressing the Volume Down button

   6. Press and then release the Power button

   7. A confirmation menu will appear: Volume Up for YES and Volume Down for NO

Note: selecting YES will erase all data including apps and games installed; if you choose YES then the erasing process will start. Once the wipe is complete, All data including third-party applications already deleted. The phone will automatically reboot and turn back on to default factory setting.

Most Download


Text Widget

Copyright © Best All mobile Repairing solutions | Powered by Blogger

Design by Anders Noren | Blogger Theme by NewBloggerThemes.com